I've just started my next project and not too far into it, I find myself having to cut mitres at my bench using hand tools. A quick process that could be a lot harder if it wasn't for a few simple Bench-top appliances.
The first step as is true with all good joinery is starting with straight stock that's been hand planed true. Once you've prepared your pieces, measure and mark with either a knife or pencil. For this project I'm using walnut which I find difficult to see at the best of times so for certain cuts I actually use both.
 I make my knife cut and follow with led, think old school prison tattoos...Actually, it helps to add some contrast my eye can more readily detect when sawing accurately on Walnut.
I always make a 90 degree first with pencil across the work piece; it helps to keep things 'square' when you mark and cut the mitre. I use a Mitre Hook at my Bench top to cut the 45. It's a quick jig made from 3/4" MDF; it consists of a base with a hook glued and screwed to the front bottom that rests against the bench top apron and a fence across the back. For the fence I used a thick piece of hard maple I had in my off-cut pile.
 I marked and cut out the kerfs for my back-saw to follow when in use. One 90, centered with a 45 degree on each side. This stock is a little better than an inch in thickness so I opt to use my larger 12" Tenon Saw filed cross cut with 13 tpi. I follow my scribe down down through the fibres careful on the exit not to cut into the MDF. That stuff is nasty for saw blades and everything else I can think of save for the jigs around a wood shop.
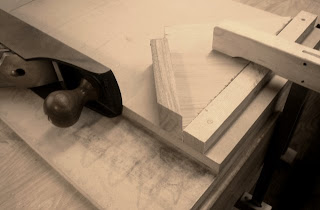
Once I have my pieces mitred I change over to my shooting board equipped with a mitre fence. The mitre fence is a simple accessory made from another off-cut; this time some 3/4" Birch plywood I had left over from some un-fulfilling job where I had to use 3/4" Birch plywood!
Just kidding, plywoods are getting better and better, the quality and overall look and performance;
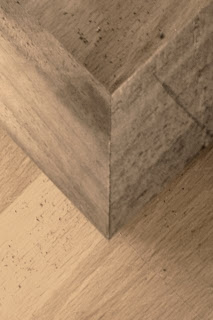
 although in my perfect world I think that I'd use solid wood for all of my projects and be able to convince all of my clients to do the same. On the shooting board I true up the mitres being careful not to blow-out the fine pointed ends. When I'm happy with the results I try matching up the pieces flat on the work bench. I use a small piece of masking tape to pull the pieces together. Looks good; a little glue and this one is done.
 For larger applications in heavier stock, this method can be awkward do to the fact that planing stock thicker than 1" can become difficult on the shooting board. Try using a 'bird-house' or 'donkey's ear' jig in combination with the shooting board, this allows the plane to travel across the grain on the 45 and not with it. There are quite a few different mitering jigs out there, look around and find one you'll enjoy using.
Reflection Method of Schwarz
 This is just something I stumbled across yesterday and tried it out this morning while cutting the above mitres.
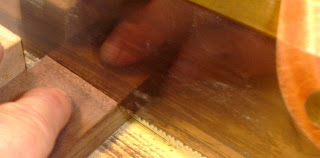
 Christopher Schwarz, Editor of Popular and Woodworking magazines was filmed during a talk at Lie-Nielson recently. He shows how to cross cut a perfect 90 using only the reflection of the stock in the side of your saw blade as a guide.

I thought our dear Mr. Schwarz may have been sitting a little too close to the Linseed Oil but hey...voila!
It works; imagine, a perfect 90 cut by eye, my eye, not his of course, that would just be strange...Anyhow, try it if you can't find a square and you happen to keep a bright shiny saw blade tucked away in yer' till somewhere.
Check it out:
No comments:
Post a Comment